

Hshare (HSR) Sign Message Tutorial
General Information:
Please read this HSR to HC swap documentation carefully and follow instructions listed on our official website: https://www.h.cash — please note: The HSR to HC swap information page on our official website has not yet been opened to the public. Thus, users are encouraged to remain cautious of phishing websites and other scams trying to steal their HSR.
As a reminder: this swap program is only intended for users with direct access to their private keys. We strongly recommend you to store your Hshare into one of the supported mobile wallet programs should you have difficulty in accessing or operating your private key or can’t access your private key. The HCASH Mobile Wallet and HyperPay Wallet are two supporting wallets that have announced their support and will be providing an automatic swap.
Please note: you should only follow this tutorial after you have transferred HSR to the HSR swap burn address: H8**************************ucF (please check the official website for the burn address and follow all instructions to avoid a loss of assets)
Please reconfirm the address on the website before transferring your funds as sending funds to an incorrect address will result in the loss of assets.
A burn address is commonly known as a blackhole burn address. It is astronomically difficult to generate such an address. Additionally, the HCASH Foundation does not control any private key and/or confidential information access relating to it.
Please familiarise yourself with the uniqueness of this address (containing 26 1’s) acting as a blackhole address, as any other format/address provided indicates a phishing or other scam attempt trying to steal your HSR.
Desktop wallet / CLI wallet:
Before we begin, please note that commands used in both programs are the same, thus for simplicity purposes, we will only include screenshots of the Desktop wallet. Please use the same commands in the CLI wallet to generate a signed hash.
Open the Hshare desktop application, then in the ‘File’ section, please select the ‘Sign message’ button:

2. In the ‘Sign Message’ page, please fill in relevant information and click the ‘Sign Message’ button.
For example (please don’t use these exact details as they are used merely for illustration purposes):


The top section should contain your HShare address. This should be the same HShare address you used to send HSR to the HSR burn address.
The middle section is the message body. This is where you input the message provided by the website: it should include your transaction id (TXID) and your HC receiving address.
The bottom section is the area that will generate the signed hash, which you can use to submit on the website for authentication purposes.
The example TXID and HC address in this example is: TXID: 9712a5b659440c4f73259af4e5ec4b3eca7f2425227ee5d5aaa224bef7af7260 with HC address: TsVf6b7kyH4J9imCNJyakRQdmrwVqDXk3bW
3. When you click on the ‘Sign Message’ button, it may require you to input your wallet passphrase, which will unlock your wallet and enable the message.

4. After unlocking the wallet, you should be able to see the following changes in the interface:

5. Once the signed hash has been generated, it is advisable to verify it before submitting it to the website. As it is extremely sensitive to changes, one single change in space, character or number could result in a completely different hash, which would cause difficulties for our program to verify.
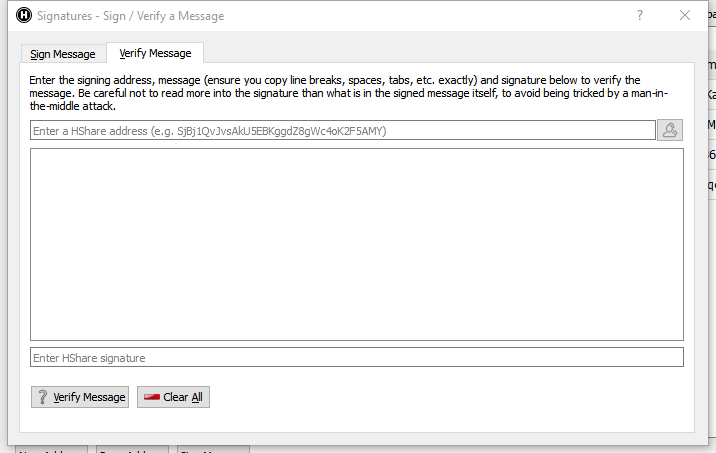
6. In the verify tab, please fill in relevant information to verify your message.

7. Click the ‘Verify Message’ button.

8. You are now ready to submit your signed hash to the website.
9. After this, click ‘Confirm’ to finish your swap request.

Hardware wallet:
If users have updated their ledger program to Ledger Live, it is recommended that they download the old Ledger Wallet Bitcoin Chrome app (with the sole purpose of generating a signed hash as the updated Ledger Live program currently lacks this feature.)
Please find the old Chrome App at: https://chrome.google.com/webstore/detail/ledger-wallet-bitcoin/kkdpmhnladdopljabkgpacgpliggeeaf?hl=en
2. Open the old Ledger Wallet Bitcoin Chrome App

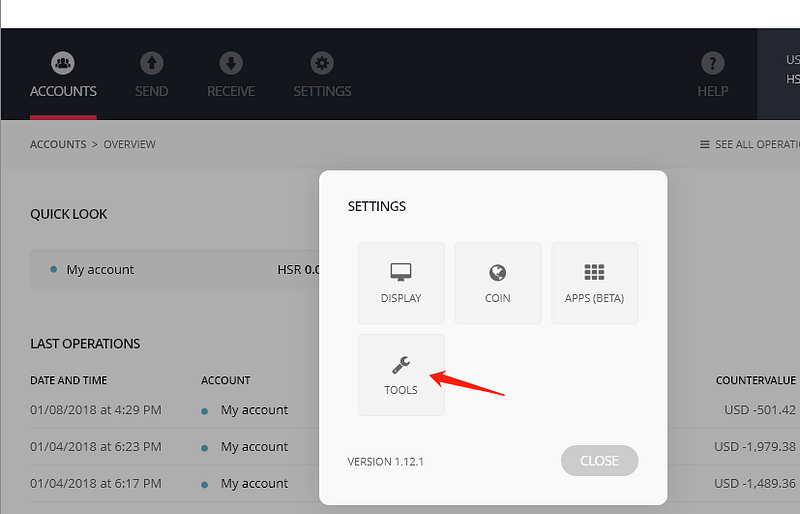
3. Click the ‘SETTINGS’ tab and open ‘TOOLS’
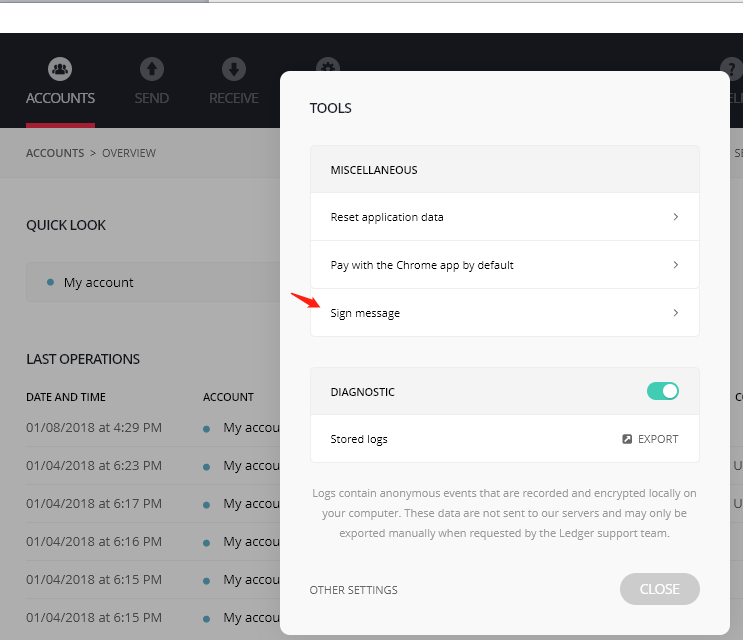
4. Click the ‘Sign message’ button
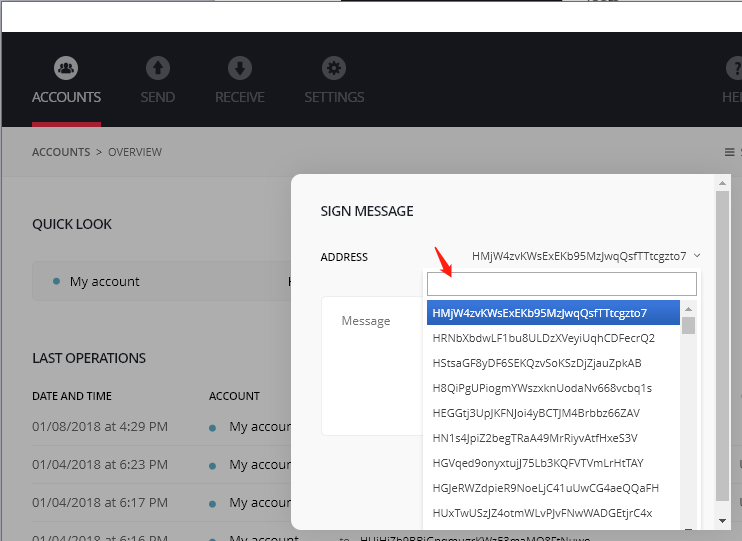
5. In the ‘Sign message’ interface, please select the address to generate the signature. (This address should correspond with the TXID you are trying to sign with, and in some circumstances, there may be multiple send-from addresses that you can choose from, anyone of them will suffice.)
6. In the ‘Message’ section, please copy and paste the information obtained from the website (an example of this can be seen below):
TXID: 9712a5b659440c4f73259af4e5ec4b3eca7f2425227ee5d5aaa224bef7af7260 with HC address: TsVf6b7kyH4J9imCNJyakRQdmrwVqDXk3bW
Copy and paste this information into the ‘Message’ section
7. Then click the ‘Sign’ button

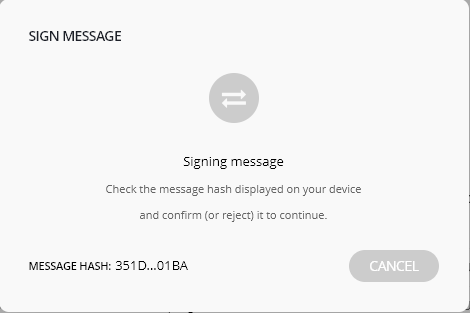
Please confirm this message on your hardware wallet. After this, the program will generate the signed hash.
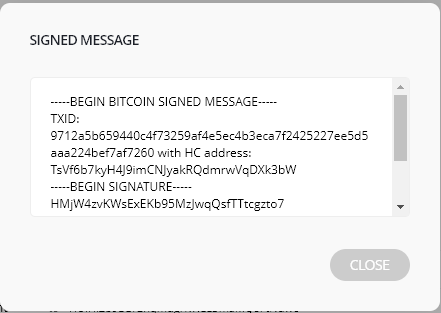
Then, please copy this message and paste it into the website to finish your swap request.
Multisignature Addresses:
Because the multisig address is a script hash by nature, it will require the sender to submit a redeemscript along with signatures generated by all wallets that authorised the payment.
If you have the redeemscript ready, please ignore the following step.
Should you require a redeemscript, the command to generate it should be run on the original computer that created the multisig wallet:
validateaddress [multisig-address]
For example:
validateaddress hNsPekPjrcGvMHcvqHW2UQXBmTsDdA4fdB

The hex section is the redeemscript.
In the sigsrequired section: 2 means this multisig address requires at least two wallets to sign on any transaction.
This means that our exchange program will also require two of the wallets to generate a signed hash individually to submit along with the redeemscript.

Step 1: in this page in the website (shown above), users are required to submit their redeemscript here.
Step 2: users are required to inform the website n of m signature that is required for the multisig set up.
After this, the website will present a new page for users to paste all the necessary addresses and signatures from each individual wallet.
After this, click ‘Confirm’ to finish your swap request.